
How To Create A 360 Virtual Tour
InsightsHow to Create a 360 Virtual Tour: A Complete Beginner’s Guide
Creating immersive, interactive 360 virtual tours is a powerful way to showcase spaces online. Whether you’re promoting a property, school, or business, a well-made virtual tour engages viewers and boosts conversions.
In this step-by-step guide, you’ll learn how to create a 360 virtual tour, from choosing the right camera to producing your final, shareable tour. This guide is ideal for beginners and intermediate users alike.
Step 1: Choose the Right Camera for Virtual Tour Photography
Before you start shooting, you’ll need to choose the best camera setup for your project. There are two main options when it comes to capturing 360-degree images for virtual tours: DSLR setups and one-shot 360 cameras. Using a DSLR with appropriate kit will give you the best results, but the learning curve its steep, and takes time to perfect. One-shot cameras are generally lower quality, but are quick to pick up and get started with.
Option 1: DSLR Camera with Fisheye Lens and Panoramic Mount
Professional photographers often prefer using a DSLR camera with a fisheye lens mounted on a panoramic tripod head. This method offers:
- Superior image quality and high resolution
- Full control over exposure and dynamic range
- Raw image capture for flexible editing
You’ll typically shoot between 4–12 overlapping images from a single tripod position, which are then stitched together in post-production. The exact method will be determined by your setup, but for example, we shoot using Canon DSLR cameras, and use professional grade Canon Fish-eye lenses, typically the 8-15mm L series. We also recommend shooting your 360 scenes in multiple exposures, especially when shooting spaces that have contrasting lighting. Most DSLR and Mirrorless cameras have settings for shooting in multi exposure, and will output 3 separately exposed shots per angle.
Recommended Gear:
- Camera: Canon EOS R or Nikon Z series
- Lens: Sigma 15mm or Canon 8–15mm fisheye
- Mount: Nodal Ninja panoramic head
This option is ideal for high-end virtual tour photography where detail and control are essential.
Option 2: One-Shot 360 Cameras
For speed, portability, and simplicity, one-shot 360 cameras are increasingly popular. These compact devices capture a full 360° image in a single click. Top choices include cameras from the following brands:
- Insta360
- Ricoh Theta
These cameras are fantastic for property, education, tourism, and quick turnarounds. While image quality may not match a DSLR, they’re often “good enough” for those wanting a budget friendly option. We recommend the Insta360 brand of cameras, and we use these for our clients who want to capture their own imagery for projects, and offer a rental service. The Insta360 X5 or the Insta360 X4 is an excellent choice, and can capture both still 360 images and 360 video. For those on a budget, the Insta360 X3 or the Insta360 One X2 are good options, but have lower image quality. Insta360 also comes with software for extracting your captures, and provides basic editing such as brightness, levelling, and more.
Step 2: Capture Your 360 Virtual Tour Content
Planning your shoot is critical. High-quality preperation means less editing later and a better user experience overall.
Tips for Shooting 360 Virtual Tours:
- Use a sturdy tripod: Whilst many recommend shooting at eye level, we suggest positioning your camera at chest height. Why? When tours are viewed straight on, a head-height shot often shows too much ceiling. Lowering the camera gives a more balanced view of the floor, key room features, and ceiling. For outdoor scenes, feel free to raise the height, and adjust accordingly for spaces with particularly high ceilings.
- Turn on all interior lights: Helps avoid dark patches and improves exposure balance.
- Avoid movement: Ensure no people or pets move through the frame during shooting.
- Tidy your space: Remove clutter, straighten furniture, and make the area look welcoming. We have a number of guides for pre-shoot preparation, for both Matterport virtual tours and Bespoke virtual tours.
- Choose your shooting position within the space: Many assume that shooting from the centre of a room is ideal, but that’s not always the case. Consider the opening viewpoint users see when they first land on a scene. A central position may force you to start with the view pointing at a corner or blank wall. Instead, treat the opening shot like a still photograph: think about composition and visual interest. Sometimes the best position is off-centre, perhaps at one end or side of the room, or facing the most engaging features.
Capture scenes methodically; front entrance, foyer, each room, outdoor spaces, so they’re easy to organise into a logical path.
Step 3: Edit and Stitch Your 360° Images
Once your images are captured, it’s time to edit and stitch them into seamless panoramas. The editing process you will follow will depend on how you’ve captured your images. Using DSLR cameras and fish eye lenses gives a much higher quality result, but the editing process is more advanced, and the software required is more expensive. Using one-shot cameras is generally much quicker, and more cost effective for those on a budget, and you can often use the outputs directly from the camera with little to no editing required.
Basic Image Editing
Before stitching, clean up your photos. Although this step isn’t always required for one-shot cameras, it will result in a far higher quality virtual tour. We put our images through a number of editing processes, but we’ll come to that later. For a basic workflow, we recommend the following:
- Use an image editing package such as Adobe Photoshop (Expensive, but comes with a host of features) or free software such as GIMP to remove tripod reflections or unwanted elements.
- Apply basic colour correction and balance lighting.
Whilst the above is the minimum we recommend, for a high end result, we recommend a more advanced workflow.
Advanced Image Editing
If shooting with DSLR cameras, you will need to follow a much more advanced workflow. We put our images through a number of stages before we stitch our 360 panoramas, and always shoot in what’s called RAW. RAW images must be processed into either JPG or TIFF filetypes prior to stitching, but allow you to have far more control over the white balance and exposure levels. Adobe Photoshop is our software of choice for image editing, and comes with software for RAW conversions as well as a range of AI features for further editing. We recommend the following workflow as a starter:
- Process your RAW images using Adobe Camera RAW. This first step allows you to correct white balance (the colours in your images) to be as realistic as possible, and also correct exposure levels. Remember, when editing your images for a 360 scene, make sure all images for that scene use the same white balance settings and exposure levels to avoid discrepancies when stitching. If you’ve shot in HDR/multiple exposures, we recommend keeping these as they’ve been shot by the camera, but if you’ve accidentally set your initial exposure wrong, small adjustments can be made.
- Once you’ve processed your RAW images, you can save them in either JPG or TIFF formats, ready for the next step, stitching. See below for details of stitching software we recommend.
- Once you’ve stitched your images into your 360 panoramas, we recommend some further steps. If you’ve shot in multi exposure, we find adding some further contrast in Adobe Photoshop. This is recommended, as software often strips contrast from the images during processing, resulting in an image that has dark areas looking too bright, and colours too soft.
- When shooting indoors, you may find reflections of the camera and tripod on shiny surfaces. Using Adobe Photoshop, you can easily remove these using a combination of manual tools, and Adobes excellent AI features (don’t be afraid to use AI, it’s not a sin!).
Clean, polished images are crucial for a professional-looking tour.
Image Stitching Software for Virtual Tours
If you’re using a DSLR setup, you’ll need to stitch your individual shots into a single 360 panorama. Leading software includes:
- PTGui – High-quality stitching with manual control points and HDR support. This is the best option, but does require some learning, and we use this software for all our virtual tour imagery.
- Hugin – Free and open-source, suitable for those on a budget.
One-shot cameras usually stitch internally or via companion apps, simplifying this process.
Step 4: Choose the Best Virtual Tour Software
Once your 360 images are ready, it’s time to turn them into an interactive experience using virtual tour software. Virtual tour software allows you to import your 360 images, and add in a range of options such as navigation, Hotspots, and also allows you to add in Nadir patches (the base of the 360 panorama, typically showing the tripod, or a hole where the full 360 image hasn’t been covered) to cover any tripods that are in your shots.
Here are some top options depending on your needs:
1. Pano2VR
Pano2VR is an excellent option, although not a great for first time users. Its feature set is vast, and comes with a number of pre-installed skins allowing you to carry over your 360 panoramas, and output a web ready virtual tour. It also has a number of options for designing your own virtual tour interfaces, so you can further customise your virtual tour to your brand. It has a one-off license cost, and is desktop based, meaning you’ll need to have your own web-server for uploading the final tour.
- Powerful, flexible and favoured by many professional creators
- Great for custom skins and maps
- Requires a bit more learning but offers excellent control
2. Kuula
Kuula is a web-based platform that is very easy to use, and perfect for smaller tours and a much simpler end result. It’s feature set is limited, and is web-based, with subscription options for access to the full range of features and to remove Kuula branding.
- Browser-based and easy to use
- Great for quick deployment and lightweight tours
- Offers branding, links, and hotspot features
- Better suited to basic virtual tours, or for use as a portfolio site for your imagery
3. Use our vtCMS
Our Virtual Tour Content Management System (vtCMS) can be used with imagery you capture yourself, giving you access to our industry leading virtual tour builder, using your own imagery. It’s a great option for those on a budget, with pricing as low as £60 excl VAT per year. Simply capture your own imagery, by using a high-end DSLR approach, or using simple one-shot systems like the Insta360 cameras we’ve mentioned above, and upload to your projects using your own Dashboard. Our web based builder allows you to adjust all settings, build navigation menus, and populate your virtual tours with a range of Hotspots, including text, images, galleries, video, PDF downloads, and more. Edit the content whenever you need to, add more 360 panoramas, or delete ones you no longer need, all at the touch of a button.
- Designed for both creators and end clients
- Easily update tours post-publish
- Offer client access control, branding, hosting, and more
- Perfect for businesses wanting scalable, editable, professional virtual tours
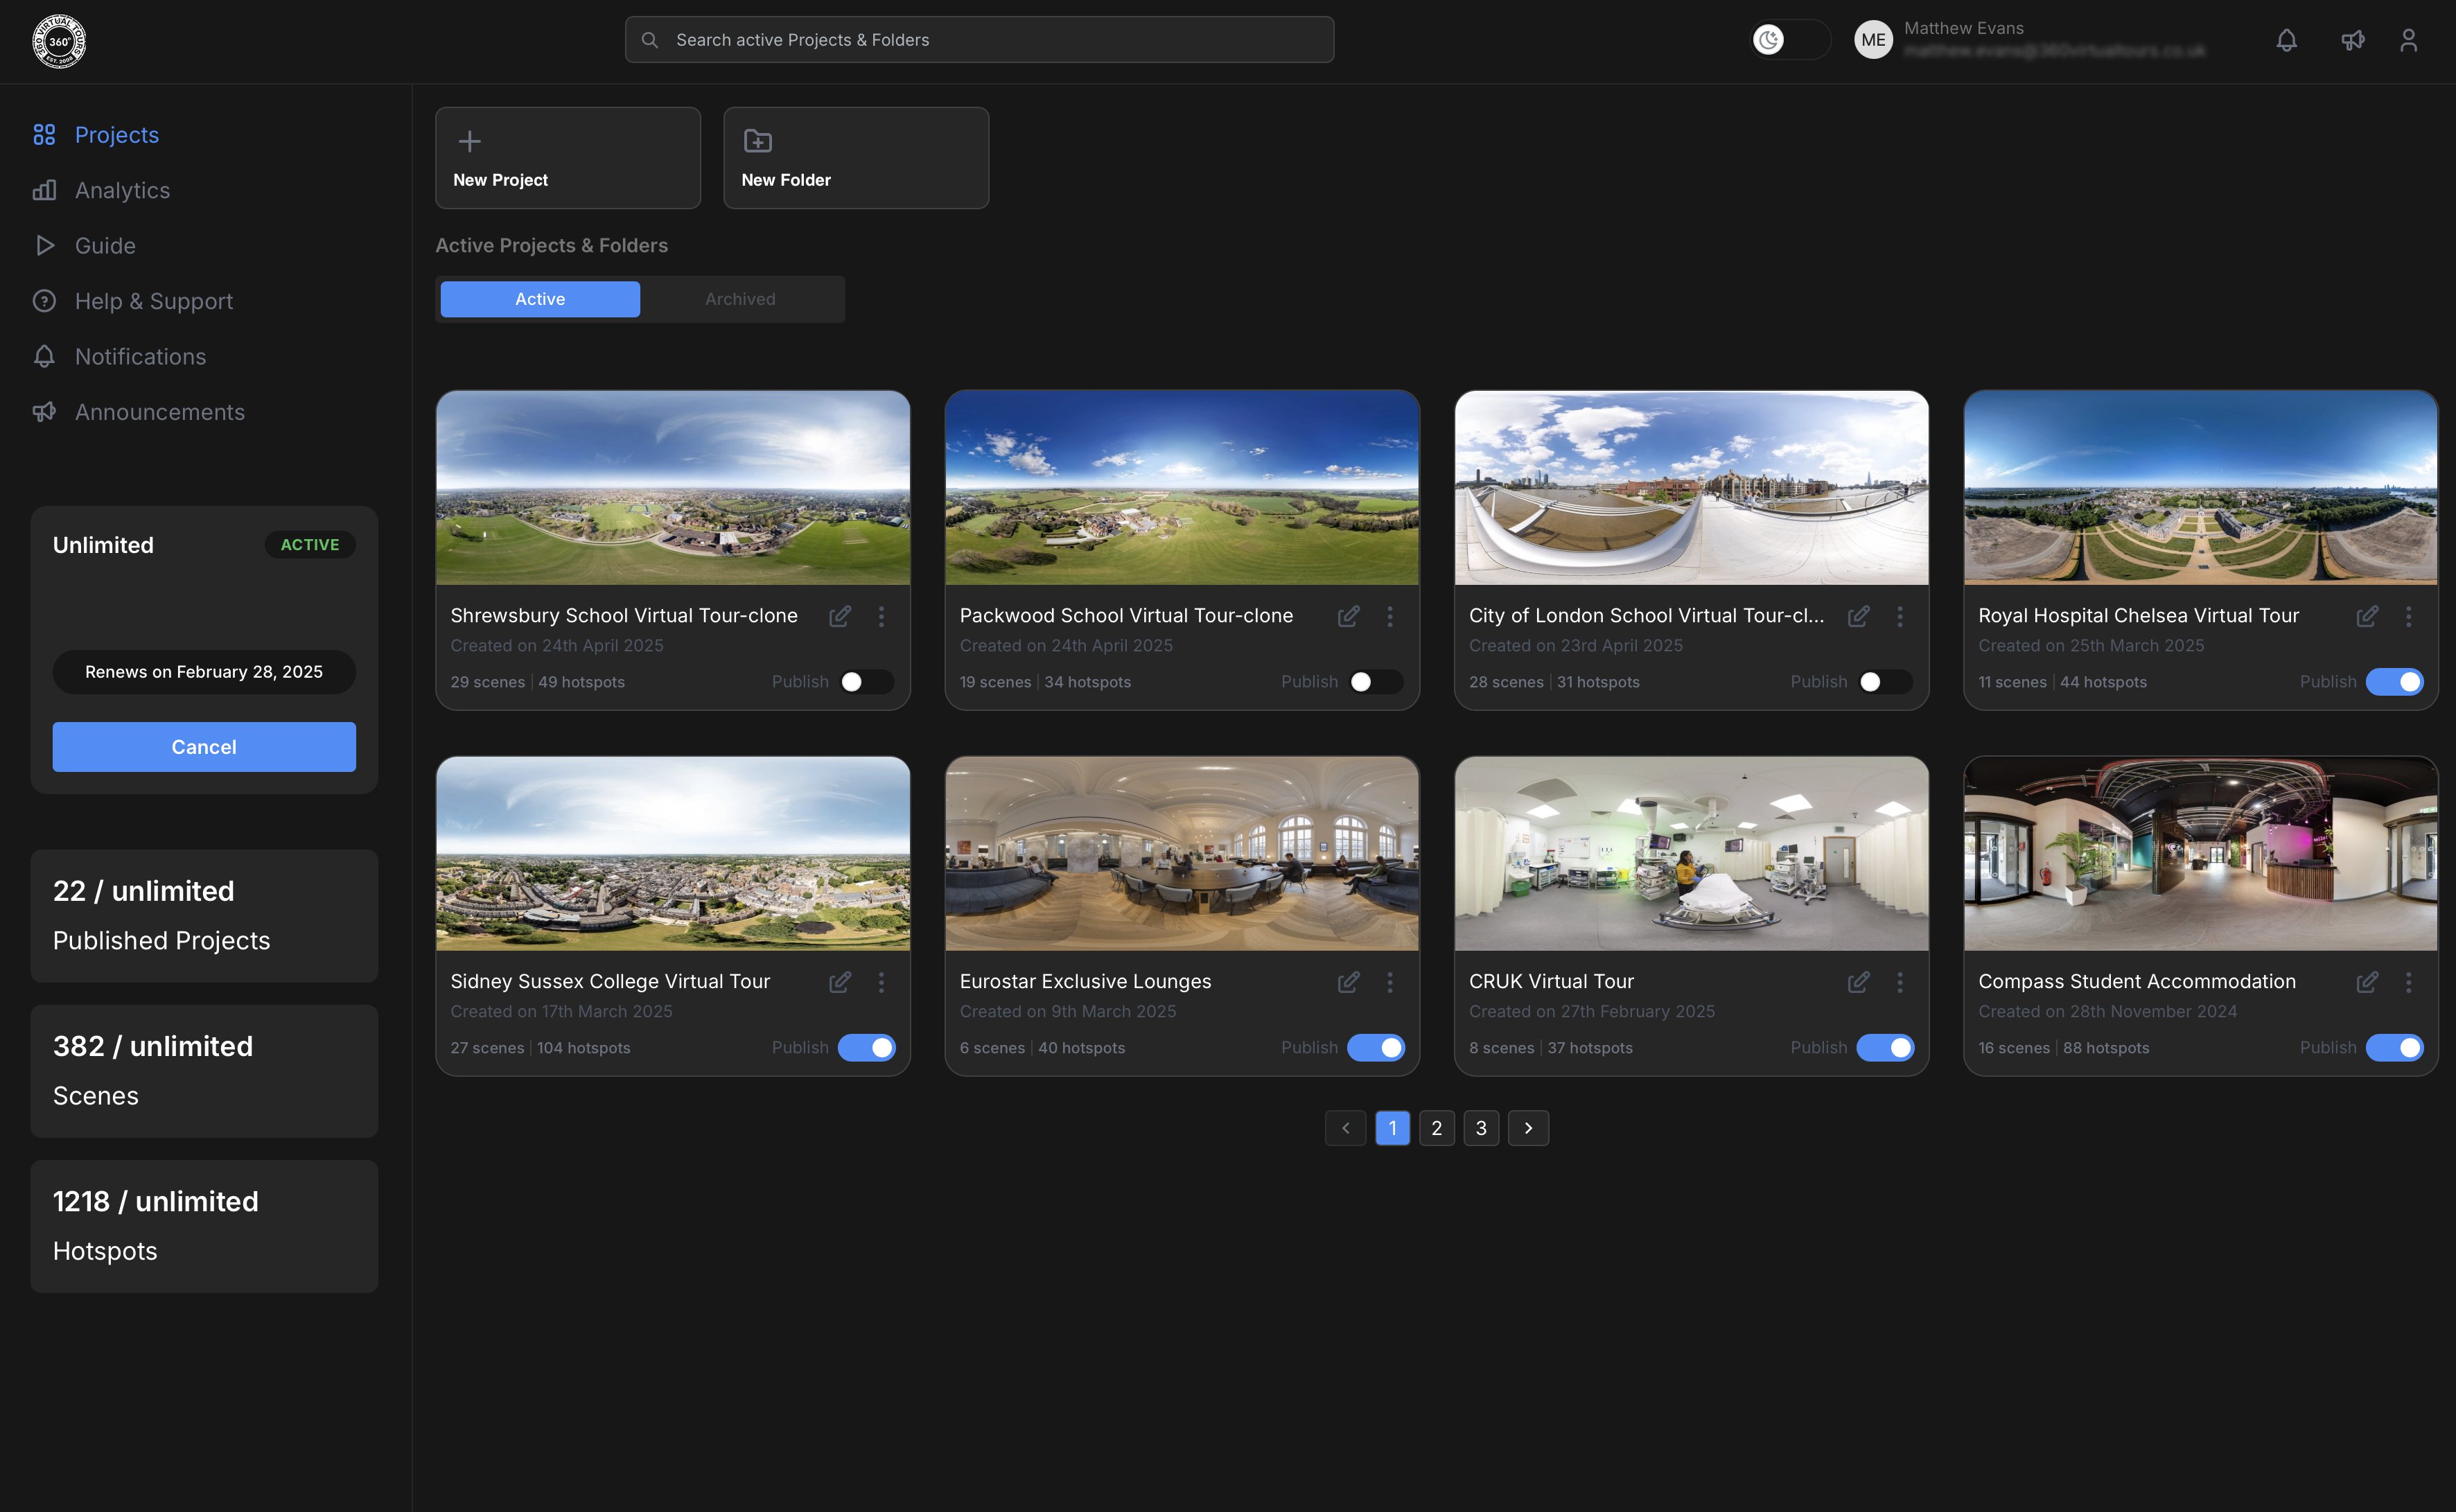
Above you can see our builder platform Dashboard, where you can manage your virtual tour, view analytics, and edit your projects at any time.
For more help or advice, please get in touch with us and we can give you assistance in shooting and creating your own 360 virtual tours.
This guide contains links to external websites. View 3sixty Ltd has no control over these sites and is not responsible for their content. Some links may be affiliate links, which means we may receive a small commission if a purchase is made, at no extra cost to you.